Installing WaterTAP
Introduction
Using Conda environments
Conda environments are a way to create and manage multiple sets of packages and/or Python versions on the same system without incurring conflicts.
Each Conda environment is a dedicated directory, separate from other Conda environments and the operating system’s own directories, containing its own collection of packages, executables, and Python installation, including the Python interpreter.
Once a Conda environment is activated, using the conda activate command in a terminal/console, the environment’s own version of Python will be used to run commands or interactive sessions for the remainder of the session.
For these reasons, Conda environments are especially useful to install and manage multiple projects (and/or multiple versions of the same project) on the same computer with minimal effort, as they provide a way to seamlessly switch between different projects without conflicts.
Using Conda environments is not mandatory to be able to install and use WaterTAP; however, it is strongly recommended.
To use Conda environments, the conda package manager is required. Refer to the Conda installation guide for detailed steps on how to install Conda for your operating system.
General installation
If you are going to use WaterTAP’s functionality, but do not plan to contribute to WaterTAP’s codebase, choose this option.
Create a Conda environment (in this example, named
watertap) where WaterTAP and its runtime dependencies will be installed:conda create --name watertap --yes python=3.8 pip=21.1
Activate the
watertapenvironment:conda activate watertap
To verify that the correct environment is active, run the following command:
python -c "import sys; print(sys.executable)"If the environment was activated correctly, its name should be contained in the path displayed by the above command.
Important
The
conda activatecommand described above must be run each time a new terminal/console session is started.Install WaterTAP using
pip:pip install watertap
To verify that the installation was successful, open a Python interpreter and try importing some of WaterTAP’s modules, e.g.:
python
>>> from watertap.unit_models import *
Installing solvers distributed through IDAES Extensions
After installing WaterTAP, the idaes get-extensions command can be used to automatically install the solvers distributed as part of the IDAES Extensions.
Important
Depending on your operating system, additional steps might be needed. For more information, refer to the IDAES installation guide.
From the same environment where WaterTAP was installed, run:
idaes get-extensions
Note
Typically, the idaes get-extensions command only needs to be run once for each system, as it will install the required files into a common, system-wide location.
Installing the Electrolyte Database (EDB)
To install the EDB, follow these steps:
Install MongoDB. The EDB uses MongoDB as its storage engine. MongoDB is a third-party application that must be installed separately. The “community edition” of MongoDB is free, and has all the functionality needed for the EDB. To download and install it, go to the MongoDB homepage, or directly to the MongoDB Community Server download page (see screenshot). On that page, select the correct operating system and follow the instructions to install the server.
Load data. Some electrolyte data is distributed with WaterTAP to “bootstrap” the EDB. To load it, use the
edb loadcommand — part of the EDB command-line tools — with the bootstrap option, from a shell or command window:# Load the standard data into the default MongoDB database, running locally edb load -b
Verify the installation. If the above command works, the MongoDB server is running and the data should be loaded. You can verify this in a couple of ways:
Use the command-line program to dump out the ‘base’ collection (which is small) to the console. In a shell environment where the Python package has been installed, run the following command:
edb dump -f '-' -t base
The result should be a bunch of text that resembles the following:
Wrote 2 record(s) from collection 'base' to file '<stdout>'
[{"phases": {"Liq": {"type": "AqueousPhase", "equation_of_state": "Ideal"}}, "state_definition":
"FTPx", "state_bounds": {"flow_mol": [0, 50, 100], "temperature": [273.15, 300, 650], "pressure":
[50000, 100000, 1000000]}, "pressure_ref": 100000, "temperature_ref": 300, "base_units": {"time": "s",
"length": "m", "mass": "kg", "amount": "mol", "temperature": "K"}, "name": "thermo"}, {"base_units":
{"time": "s", "length": "m", "mass": "kg", "amount": "mol", "temperature": "K"}, "phases": {"Liq":
{"type": "AqueousPhase", "equation_of_state": "Ideal"}}, "state_definition": "FTPx", "state_bounds":
{"flow_mol": [0, 50, 100], "temperature": [273.15, 300, 650], "pressure": [50000.0, 100000.0, 1000000.0]},
"pressure_ref": 100000.0, "temperature_ref": 300, "name": "water_reaction"}]
Use MongoDB’s graphical user interface, “MongoDB Compass”, to browse the data. To do this, find and start the application called “MongoDB Compass”, which should have been installed when you installed the rest of the MongoDB application. Run it, and choose to connect to the server at URL
mongodb://localhost:27017(this should be the default). You will get a screen like this one (with the database you are going to click on next circled). Then, select the “electrolytedb” database. The result should show three collections with some records loaded in each, as in this screen .
Running the WaterTAP test suite
To run the WaterTAP test suite, first install the optional testing dependencies using pip:
pip install "watertap[testing]"Then, run the following command to run the complete WaterTAP test suite:
pytest --pyargs watertap
(Optional) To see a list of available command-line options, run:
pytest --pyargs watertap --help
Note
Some tests will be skipped (denoted by an s symbol). This is to be expected, as some of the tests are only applicable within a developer environment.
For WaterTAP developers
If you plan to contribute to WaterTAP’s codebase, choose this option.
Note
Typically, contributing to WaterTAP will involve opening a Pull Request (PR) in WaterTAP’s repository. For more information, refer to How to contribute to WaterTAP’s development.
Create a Conda environment (in this example, named
watertap-dev) where WaterTAP and all dependendencies needed for development will be installed, then activate it:conda create --name watertap-dev --yes python=3.8 pip=21.1 && conda activate watertap-dev
Note
For more information about using Conda environments, refer to the “Using Conda environments” section above.
Clone the WaterTAP repository to your local development machine using
git clone, then enter the newly createdwatertapsubdirectory:git clone https://github.com/watertap-org/watertap && cd watertap
Install WaterTAP and the development dependencies using
pipand therequirements-dev.txtfile:pip install -r requirements-dev.txt
If needed, follow the steps described in the “Installing solvers distributed through IDAES Extensions” section above to install solvers distributed through IDAES Extensions.
To verify that the installation was successful, try running the WaterTAP test suite using
pytest:pytest
To view/change the generated documentation, see the Documentation for developers section
Installing in existing development environments
When either the watertap package or one of its dependencies are installed, it should be possible to update those packages within an existing developer environment.
Important
In case of any issue or unexpected behavior when updating an existing environment, first try to see if the issues are solved if a freshly created environment is used instead.
Activate the environment, if not already active:
conda activate watertap-dev
Enter the directory where your local clone of the WaterTAP repository is located, and pull the latest changes using
git pull:cd /path/to/your/clone git pullUninstall the version of
watertapthat’s currently installed in the environment:pip uninstall watertap
Run the
pip installcommand targeting therequirements-dev.txtfile.pip --no-cache-dir install -r requirements-dev.txt
Note
The
--no-cache-dirflag is used to ensure that existing packages are not erroneously reused by pip, which would cause the wrong (outdated) version to be present in the environment after installation.
Screenshots
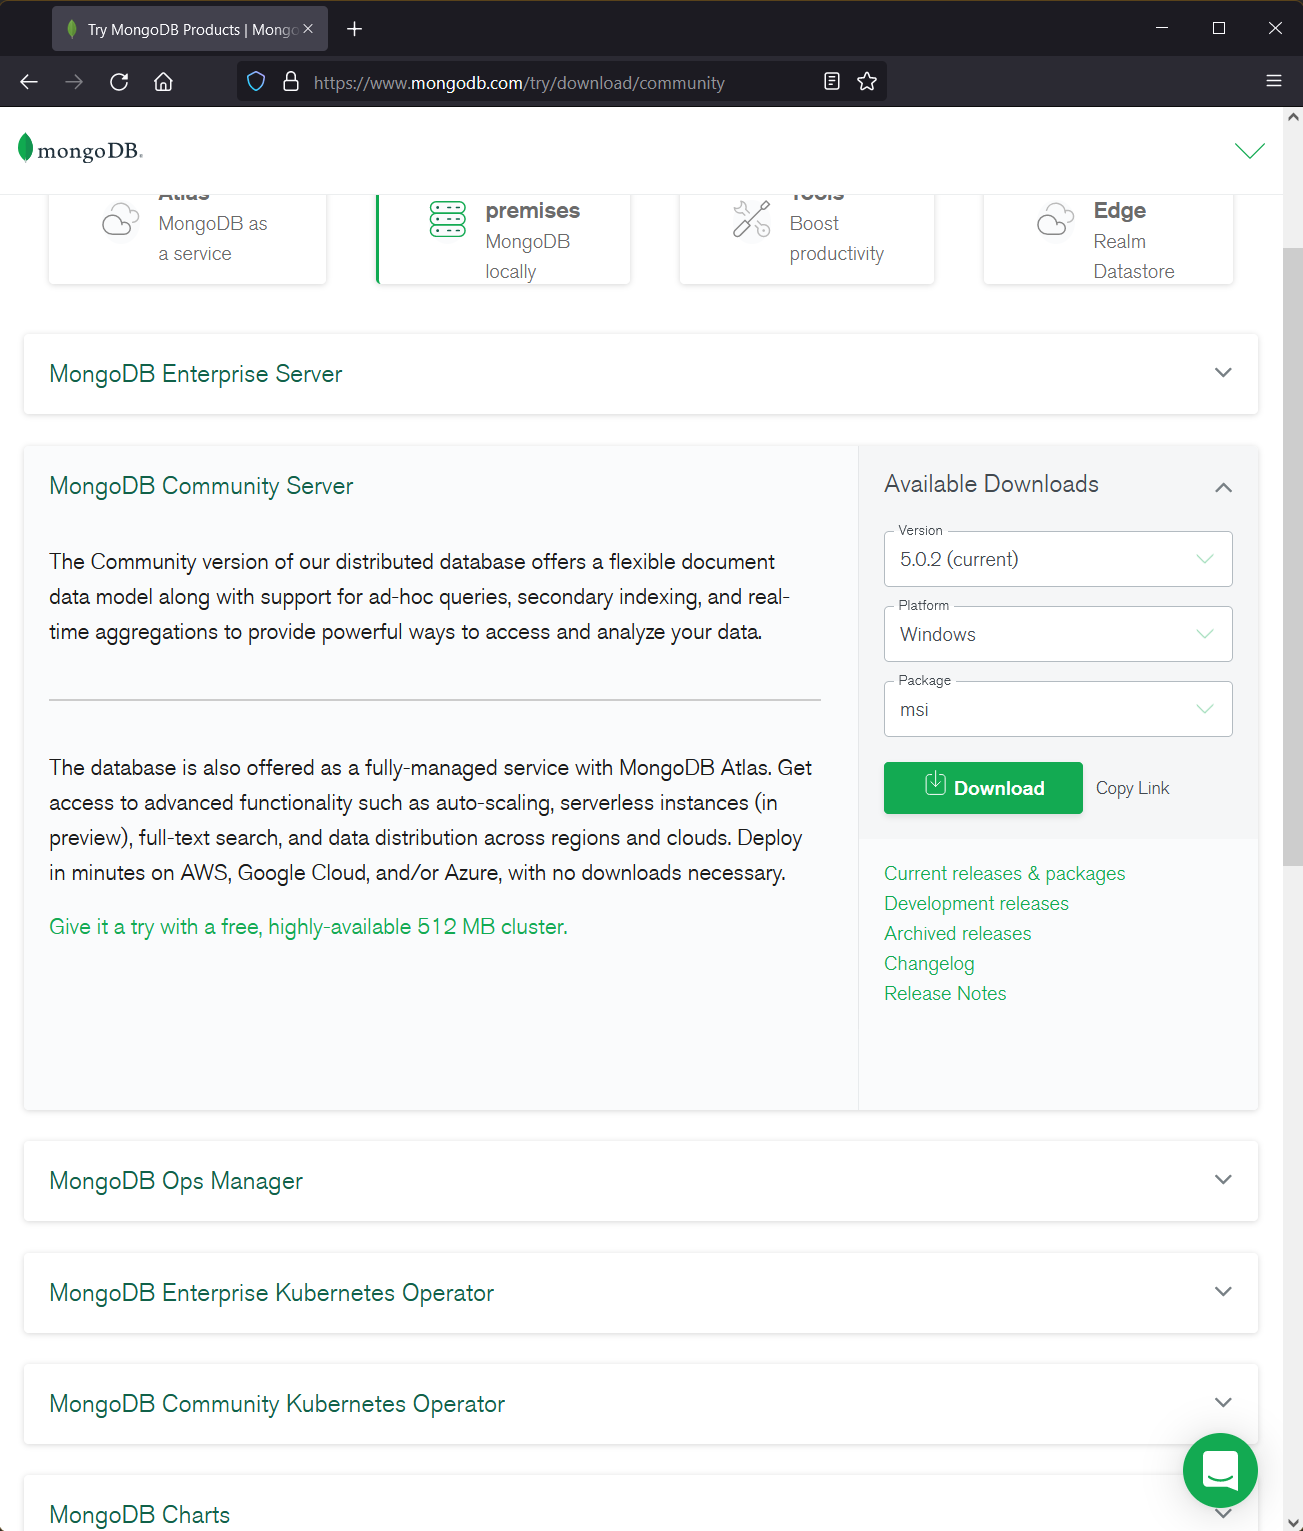
Download page for MongoDB community server (9/2021)
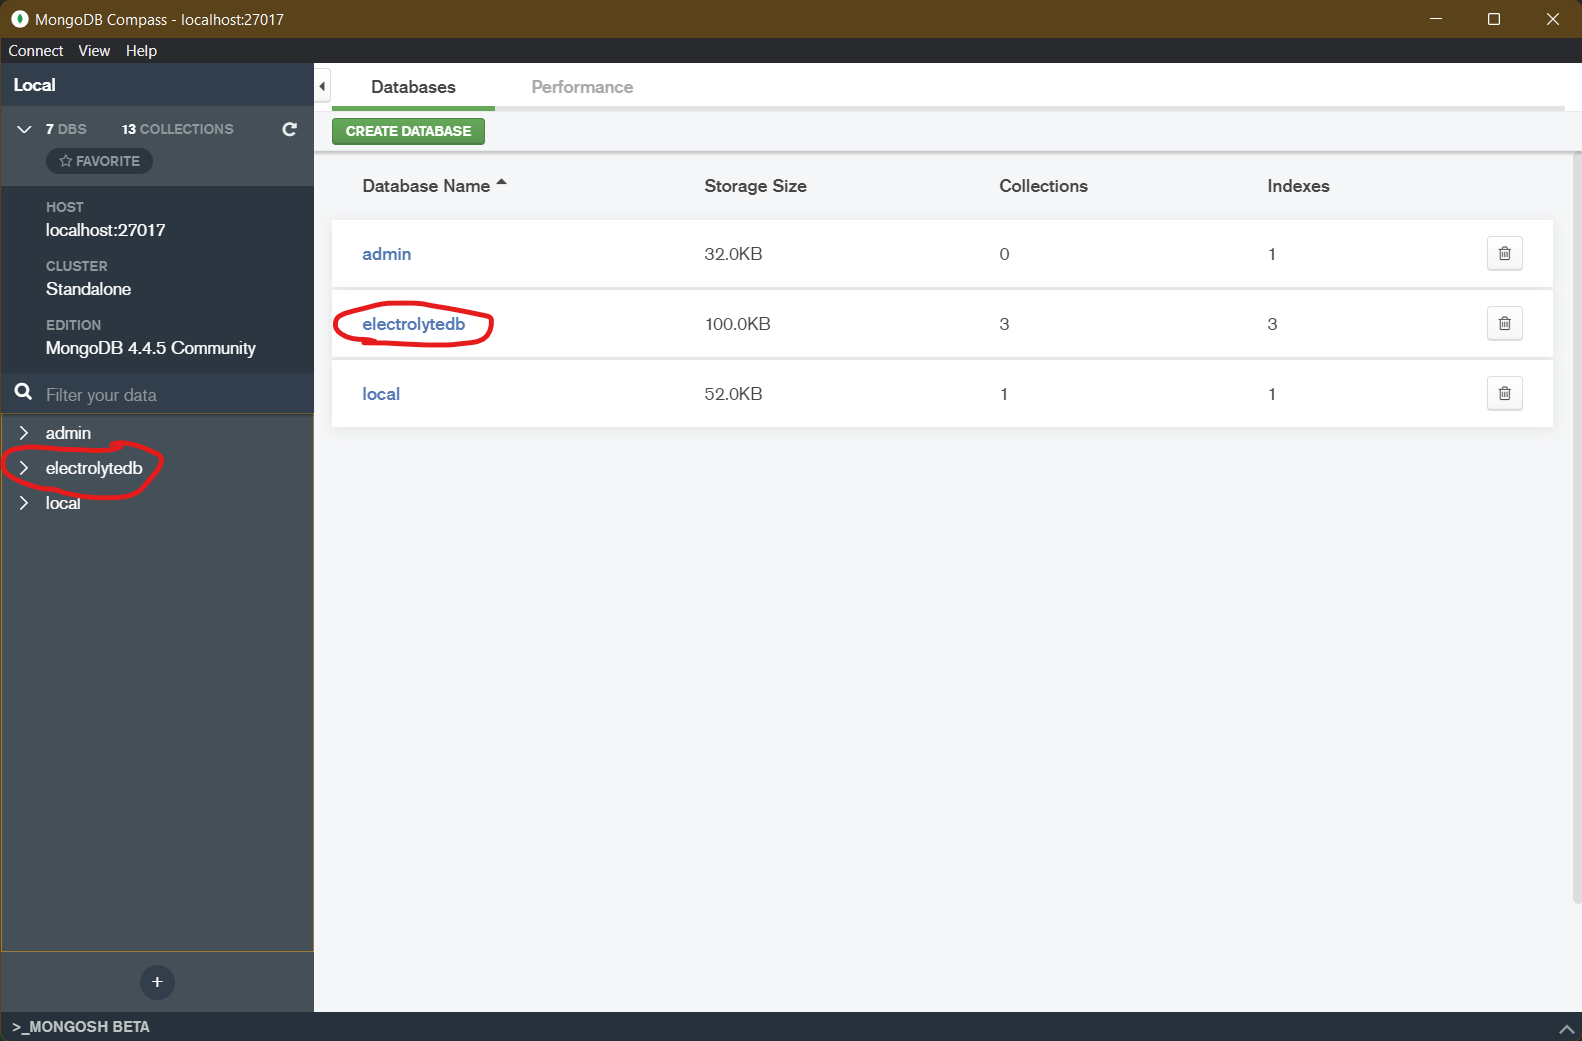
MongoDB Compass Initial Screen (9/2021)
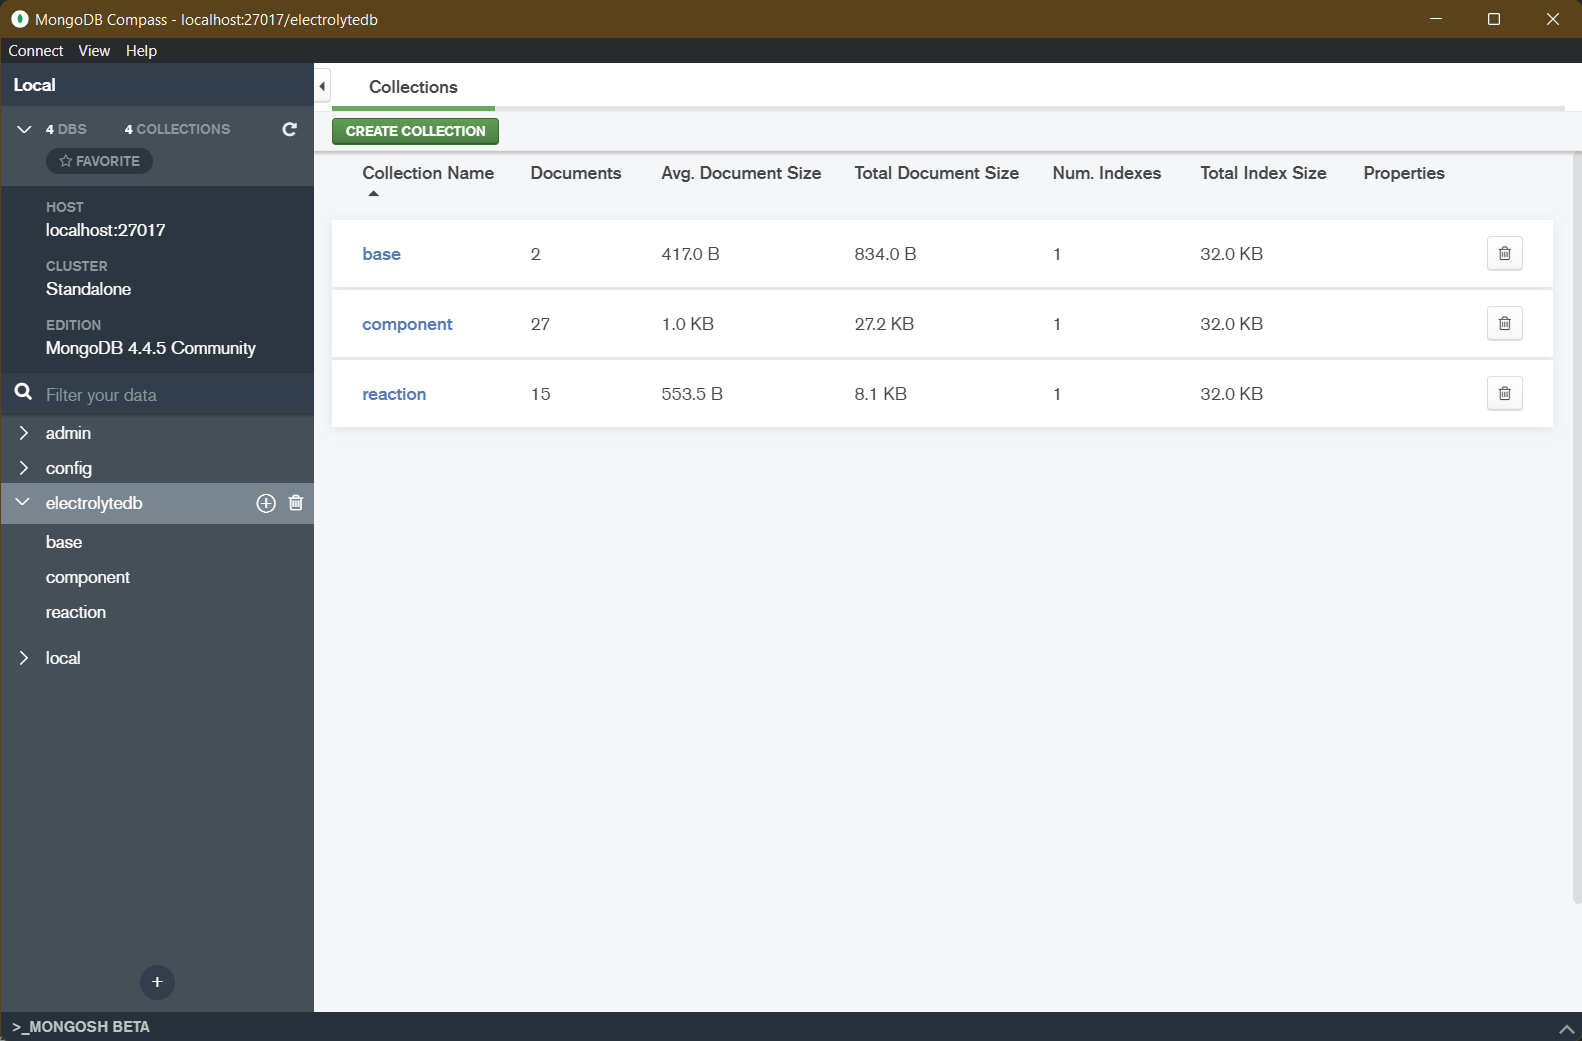
MongoDB Compass electrolytedb Collections (9/2021)
Documentation for developers
The project documentation is created and updated using the Sphinx documentation tool. This tool generates nice, indexed, HTML webpages — like this one — from text files in the “docs” directory. The documentation will include the docstrings you put on your modules, classes, methods, and functions as well as additional documentation in text files in the “docs” directory. The project is set up so that Sphinx documentation is generated automatically online for new releases. This section describes how to do this same documentation generation locally in your development environment so you can preview what will be shown to the users.
Generating the documentation
To generate a local copy of the documentation for the first time, follow these steps:
Install the
pandocexecutable. Aspandocis a standalone tool rather than a Python package, it cannot be installed usingpip. Instead, use one of the following options:If using a Conda environment, run
conda install -c conda-forge pandocAlternatively, refer to the installation steps appropriate for your system on pandoc’s website
Change directory to the “docs” subdirectory
Generate the tree of API documentation with “sphinx-apidoc”. For convenience, a script has been provided that has all the required options.
On Windows, run
.\apidoc.batOn Linux/OSX run
./apidoc.sh
Generate the HTML with Sphinx.
On Windows, run
.\make htmlOn Linux/OSX run
make html
After these steps are complete, you should be able to preview the HTML documentation by opening the file located at “_build/html/index.html” in a web browser. To see the tree of API documentation that is generated automatically from the source code, browse to the “Technical Reference” page and click on the “Modules” link at the bottom.
Updating the documentation
If you make changes in your code’s docstrings that you want to see reflected in the generated documentation, you need to re-generate the API documentation using “sphinx-apidoc”. To do this, simply re-run the command given in step 2 of Generating the documentation.
If you edited some documentation directly, i.e. created or modified a text file with extension .rst, then you don’t need to run the previous command. Regardless, you will next need to update the documentation with the Sphinx build command given in step 3 of Generating the documentation.
Important
The files under “docs/apidoc” are tracked in Git, otherwise they would not be available to the ReadTheDocs builder (that doesn’t know about sphinx-apidoc, strangely). Please remember to commit and push them along with the changes in the source code.
Documenting your modules
Full documentation for modules should be placed in the appropriate subfolder — e.g., property_models or unit_models — of the docs/technical_reference section (and folder). See docs/technical_reference/unit_modles/reverse_osmosis_0D.rst for an example.
Note that at the bottom of the file you should add the .. automodule:: directive that will insert the
documentation for your module as generated from the source code (and docstrings). This generally looks like this:
.. automodule:: watertap.<package_name>.<module_name>
    :members:
    :noindex:
The :members: option says to include all the classes, functions, etc. in the module. It is important to add
the :noindex: option, otherwise Sphinx will try to generate an index entry that conflicts with the
entry that was created by the API docs (step 2 of Generating the documentation), which would result
in warnings and failed builds for ReadTheDocs and the tests.